本博客搭建(v2):Hexo-GithubPages-GithubAction
本博客搭建:Hexo+GithubPages+TraviCI+pure
GitHub Actions 自动部署 Hexo 博客
GitHub Actions 入门教程
GitHub Actions 官方文档
背景
原有的 blog 搭建流程本博客搭建:Hexo+GithubPages+TraviCI+pure 随着 Travi CI 在 2020 年开始收费, 已经不可用.
所以改用新的方式搭建博客
目标
- 博客用一个仓库地址
- source 分支用来存放 项目源代码
- master 分支用来存放 hexo 编译 source 分支的文件后,生成的文件
- 用户只需要编写 md 博客文档, 编译生成 html 的动作交由 cicd 流程
- 之前的 cicd 使用 travi ci
- 新方式改用为 GithubAction
说明
本文调整之前搭建流程的 ci 模块 本博客搭建:Hexo+GithubPages+TraviCI+pure
配置
本地生成 ssh 密钥对
在本地生成一对 SSH 密钥,注意更改文件名避免将正在使用的密钥覆盖。
1
| ssh-keygen -t ed25519 -C "xuzhihua1107@gmail.com"
|
在博客仓库的 Settings -> Secrets -> Actions 中添加 SSH 私钥, 内容为刚刚生成的 id_ed25519 文件的秘钥值, 命名为 SSH_DEPLOY_KEY
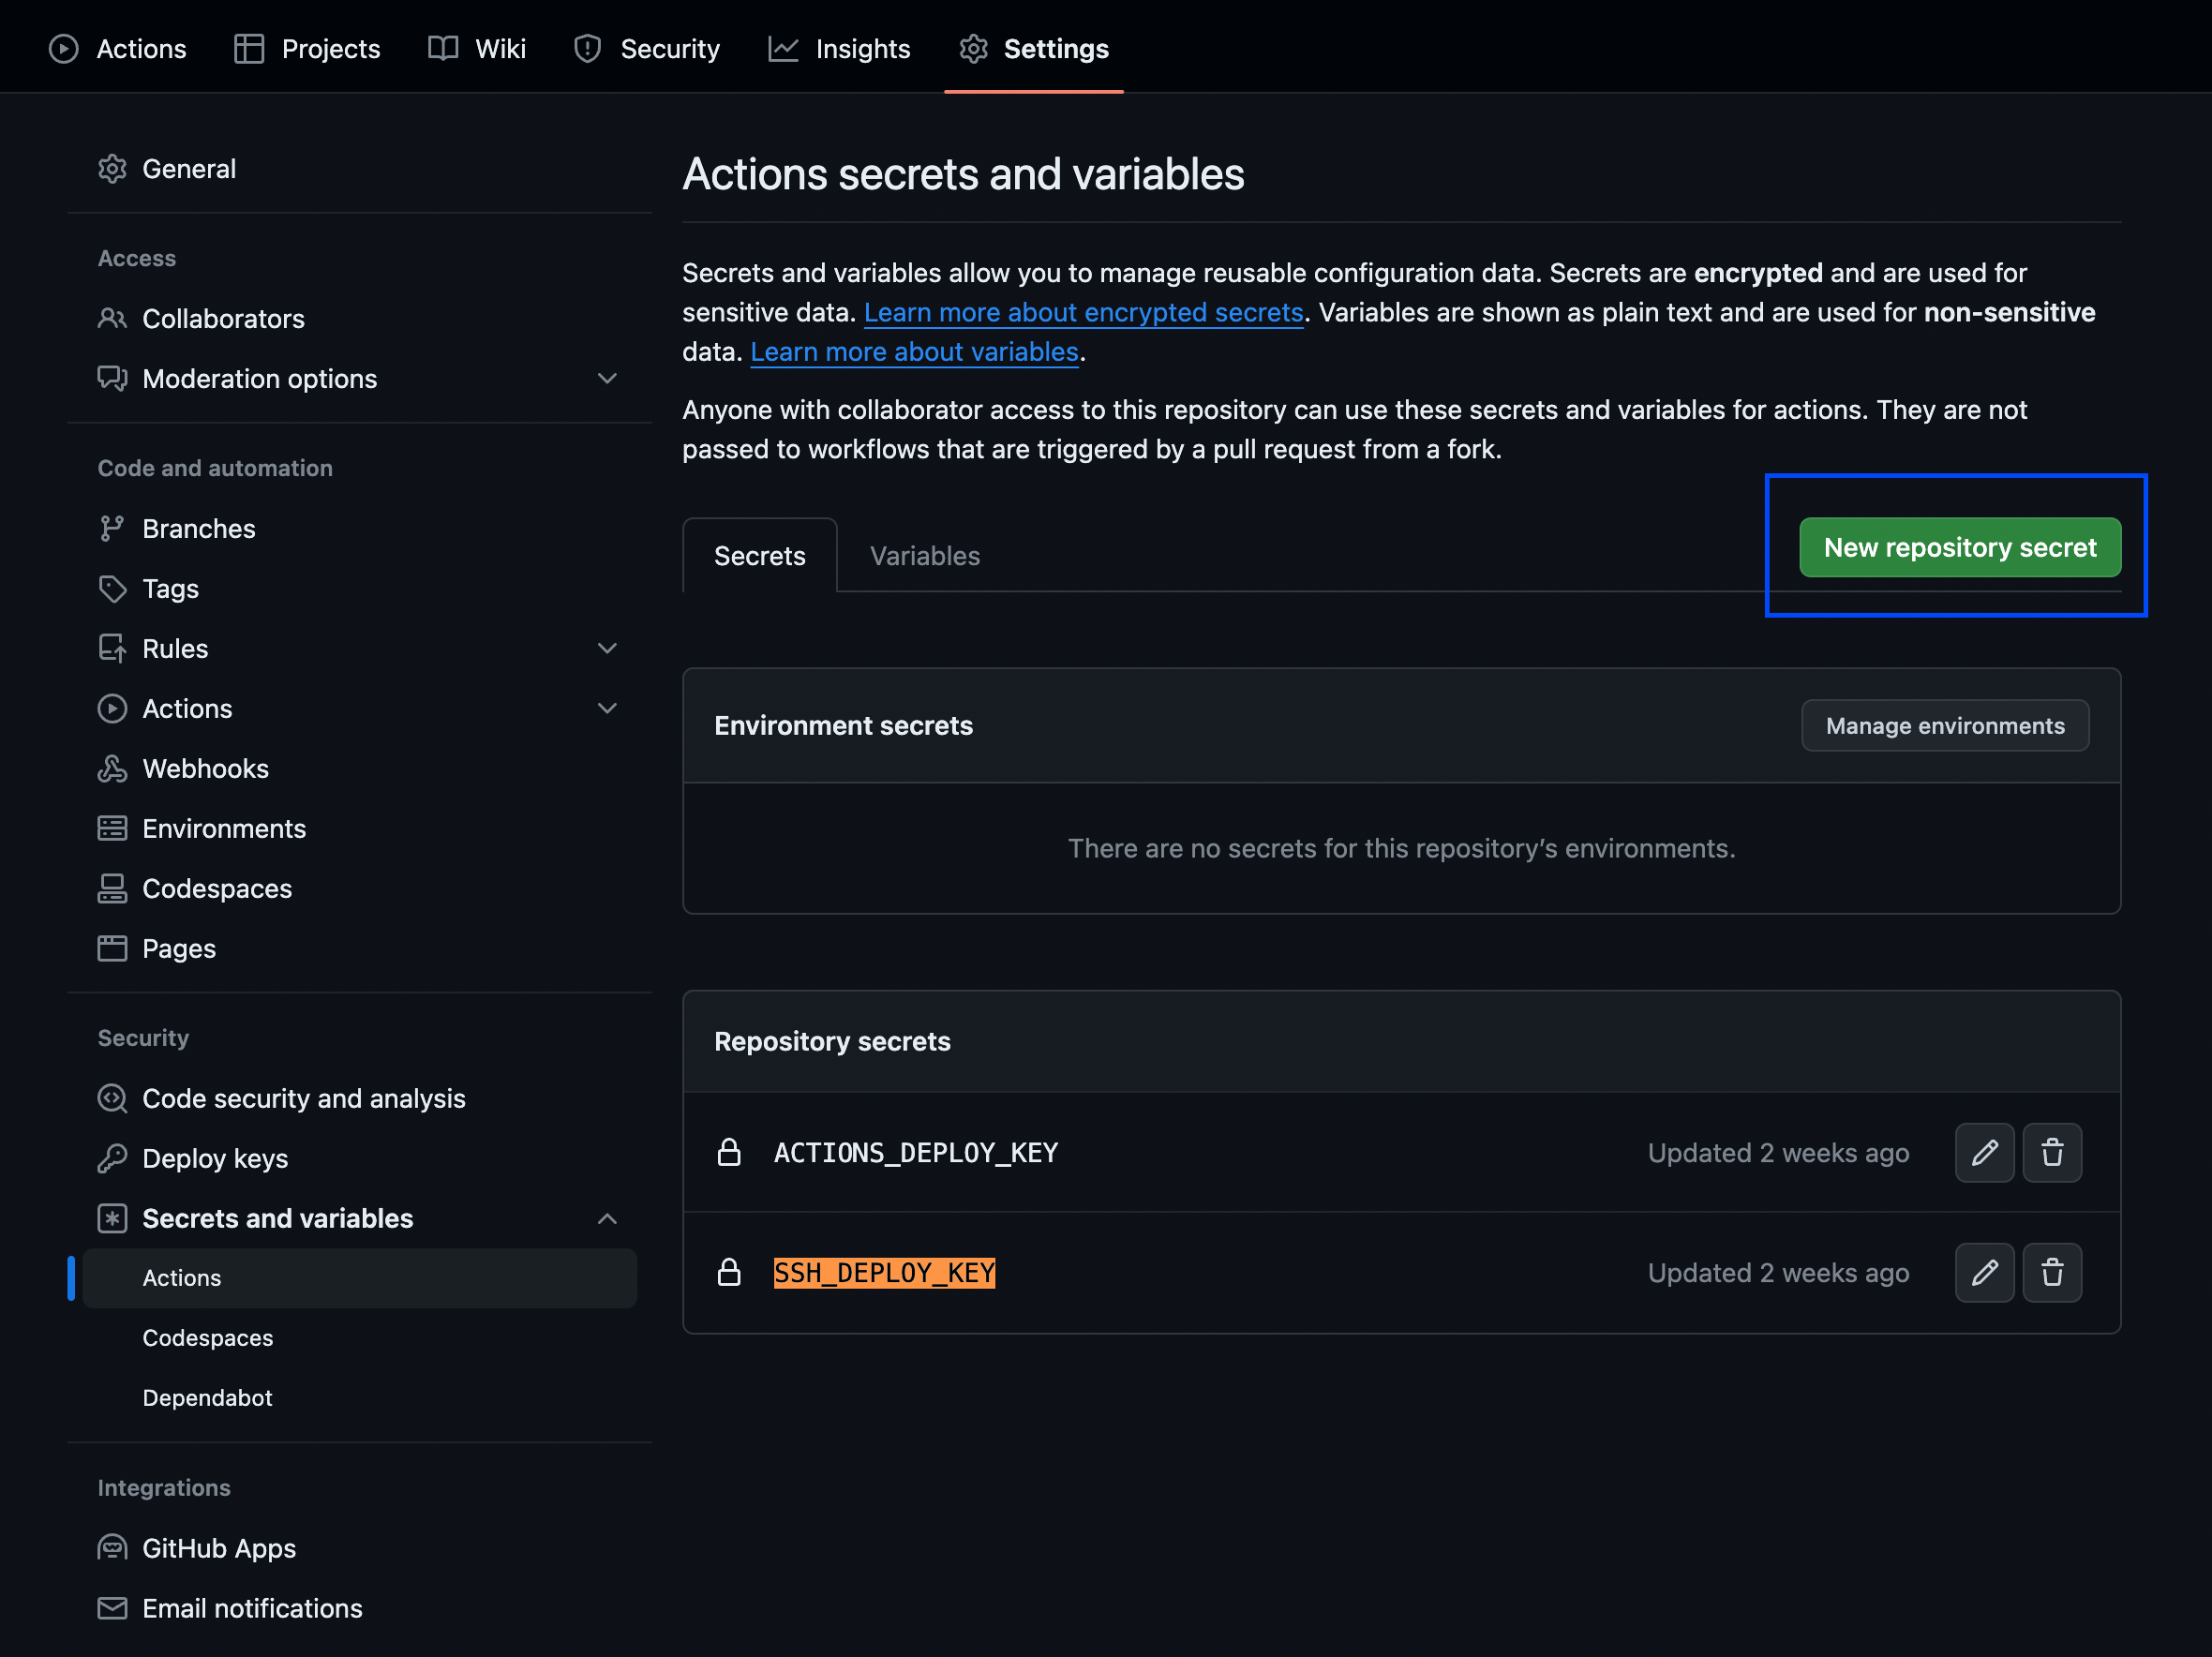
在部署仓库的 Settings -> Deploy keys 中添加 SSH 公钥, 内容为刚刚生成的 id_ed25519.pub 文件的公钥值, 命名为 public key of SSH_DEPLOY_KEY 注意勾选 Allow write access。
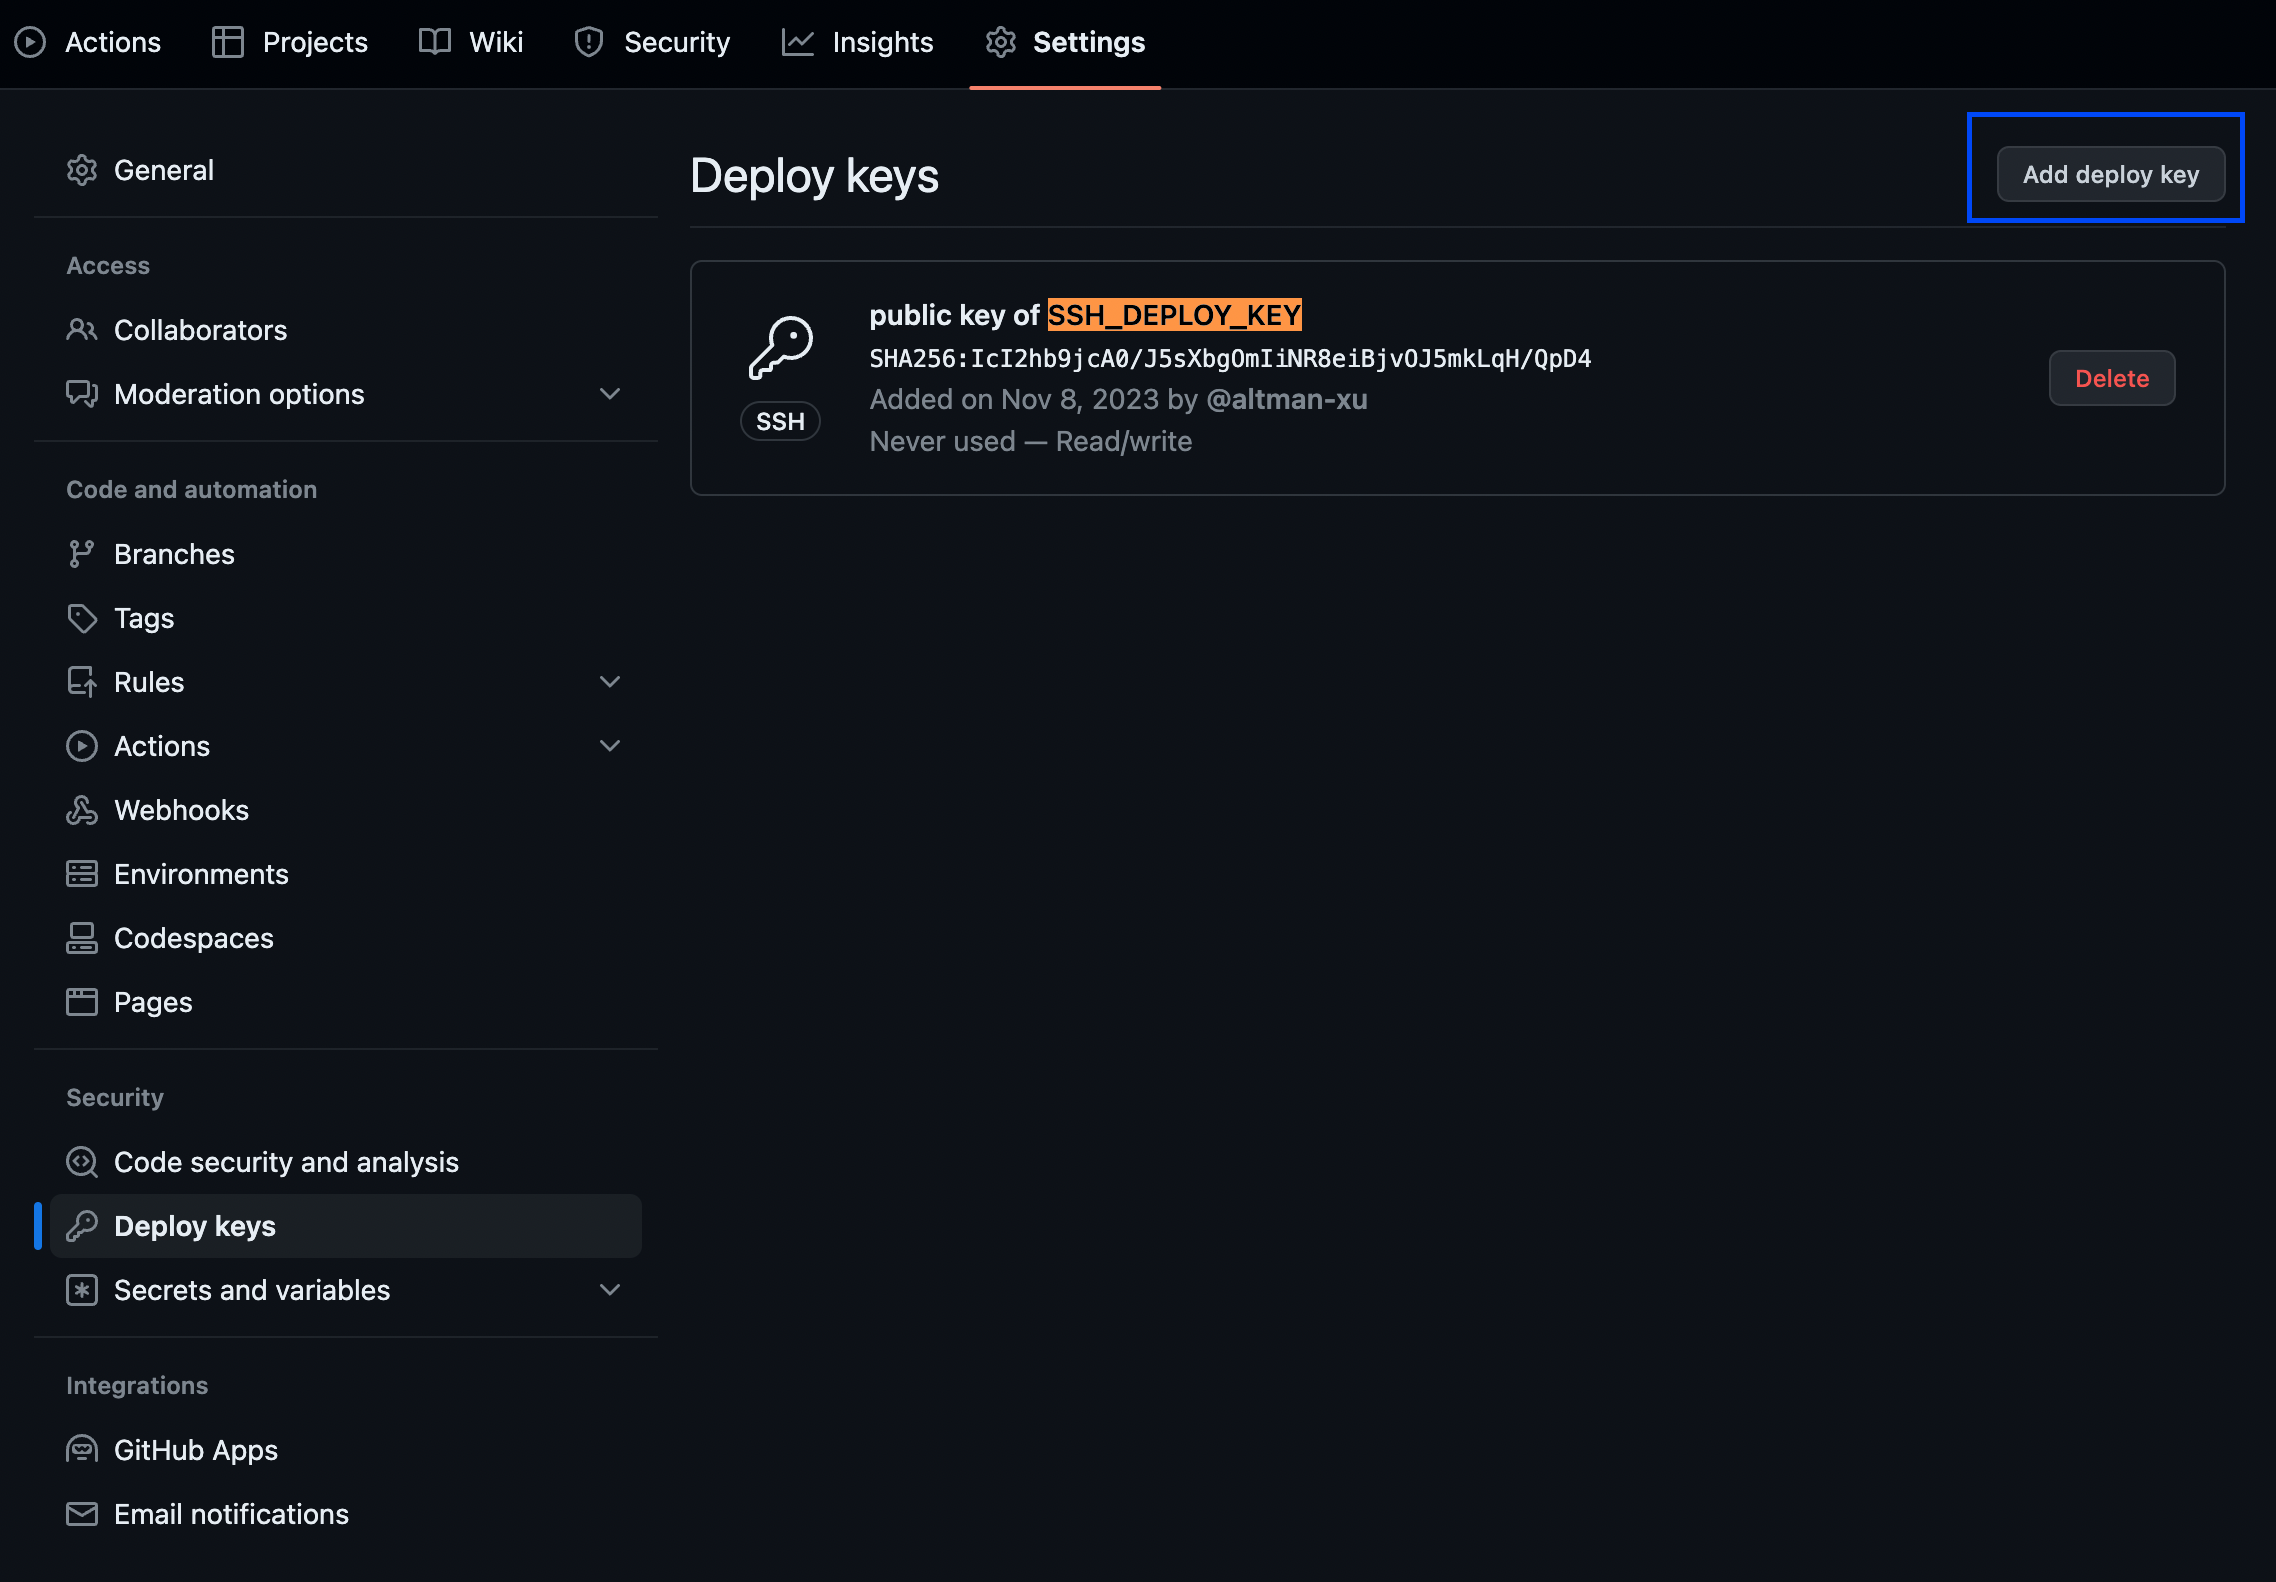
注: 后续的 workflow 会使用 SSH_DEPLOY_KEY 公钥值来部署
在 _config.yml 添加内容
_config.yml
1
2
3
4
| deploy:
type: git
repo: git@github.com:altman-xu/altman-xu.github.io.git
branch: master
|
编写 workflow
创建 .github/workflows/githubactions.yml
写入以下内容,注意修改仓库地址和 Git 配置。此时当 push 到博客仓库时,GitHub Actions 将会自动部署
1
2
3
4
5
6
7
8
9
10
11
12
13
14
15
16
17
18
19
20
21
22
23
24
25
26
27
28
29
30
31
32
33
34
35
36
37
38
39
40
41
42
43
44
45
46
47
48
49
50
51
52
53
54
55
56
57
58
59
60
61
62
63
64
65
66
67
68
69
70
71
72
73
74
| name: githubactions
env:
GIT_USER: altman-xu
GIT_EMAIL: xuzhihua1107@gmail.com
DEPLOY_REPO: altman-xu/altman-xu.github.io
DEPLOY_BRANCH: master
on:
push:
branches:
- source
jobs:
build-and-deploy:
runs-on: ubuntu-latest
steps:
- name: Checkout source
uses: actions/checkout@v2
with:
ref: source
- name: Setup Nodejs
uses: actions/setup-node@v2
with:
node-version: '10'
- name: Cache node modules
id: cache-npm
uses: actions/cache@v3
env:
cache-name: cache-node-modules
with:
path: ~/.npm
key: ${{ runner.os }}-build-${{ env.cache-name }}-${{ hashFiles('**/package-lock.json') }}
restore-keys: |
${{ runner.os }}-build-${{ env.cache-name }}-
${{ runner.os }}-build-
${{ runner.os }}-
- name: Debug Cache Hit
run: echo "${{ steps.cache-npm.outputs.cache-hit }}"
- name: Install npm
if: ${{ steps.cache-npm.outputs.cache-hit != 'true' }}
continue-on-error: true
run: npm install
- name: Install npm hexo
run: |
npm install hexo-cli -g
npm install hexo-wordcount --save
npm install hexo-generator-json-content --save
npm install hexo-generator-feed --save
npm install hexo-generator-sitemap --save
npm install hexo-generator-baidu-sitemap --save
npm install hexo-deployer-git --save
- name: Setup Git
run: |
git config --global user.name $GIT_USER
git config --global user.email $GIT_EMAIL
- name: Setup SSH Key
run: |
mkdir -p ~/.ssh
echo "${{ secrets.SSH_DEPLOY_KEY }}" > ~/.ssh/id_ed25519
chmod 600 ~/.ssh/id_ed25519
ssh-keyscan github.com >> ~/.ssh/known_hosts
- name: hexo generate
run: |
hexo clean
hexo generate
- name: hexo deploy
run: |
hexo deploy
|
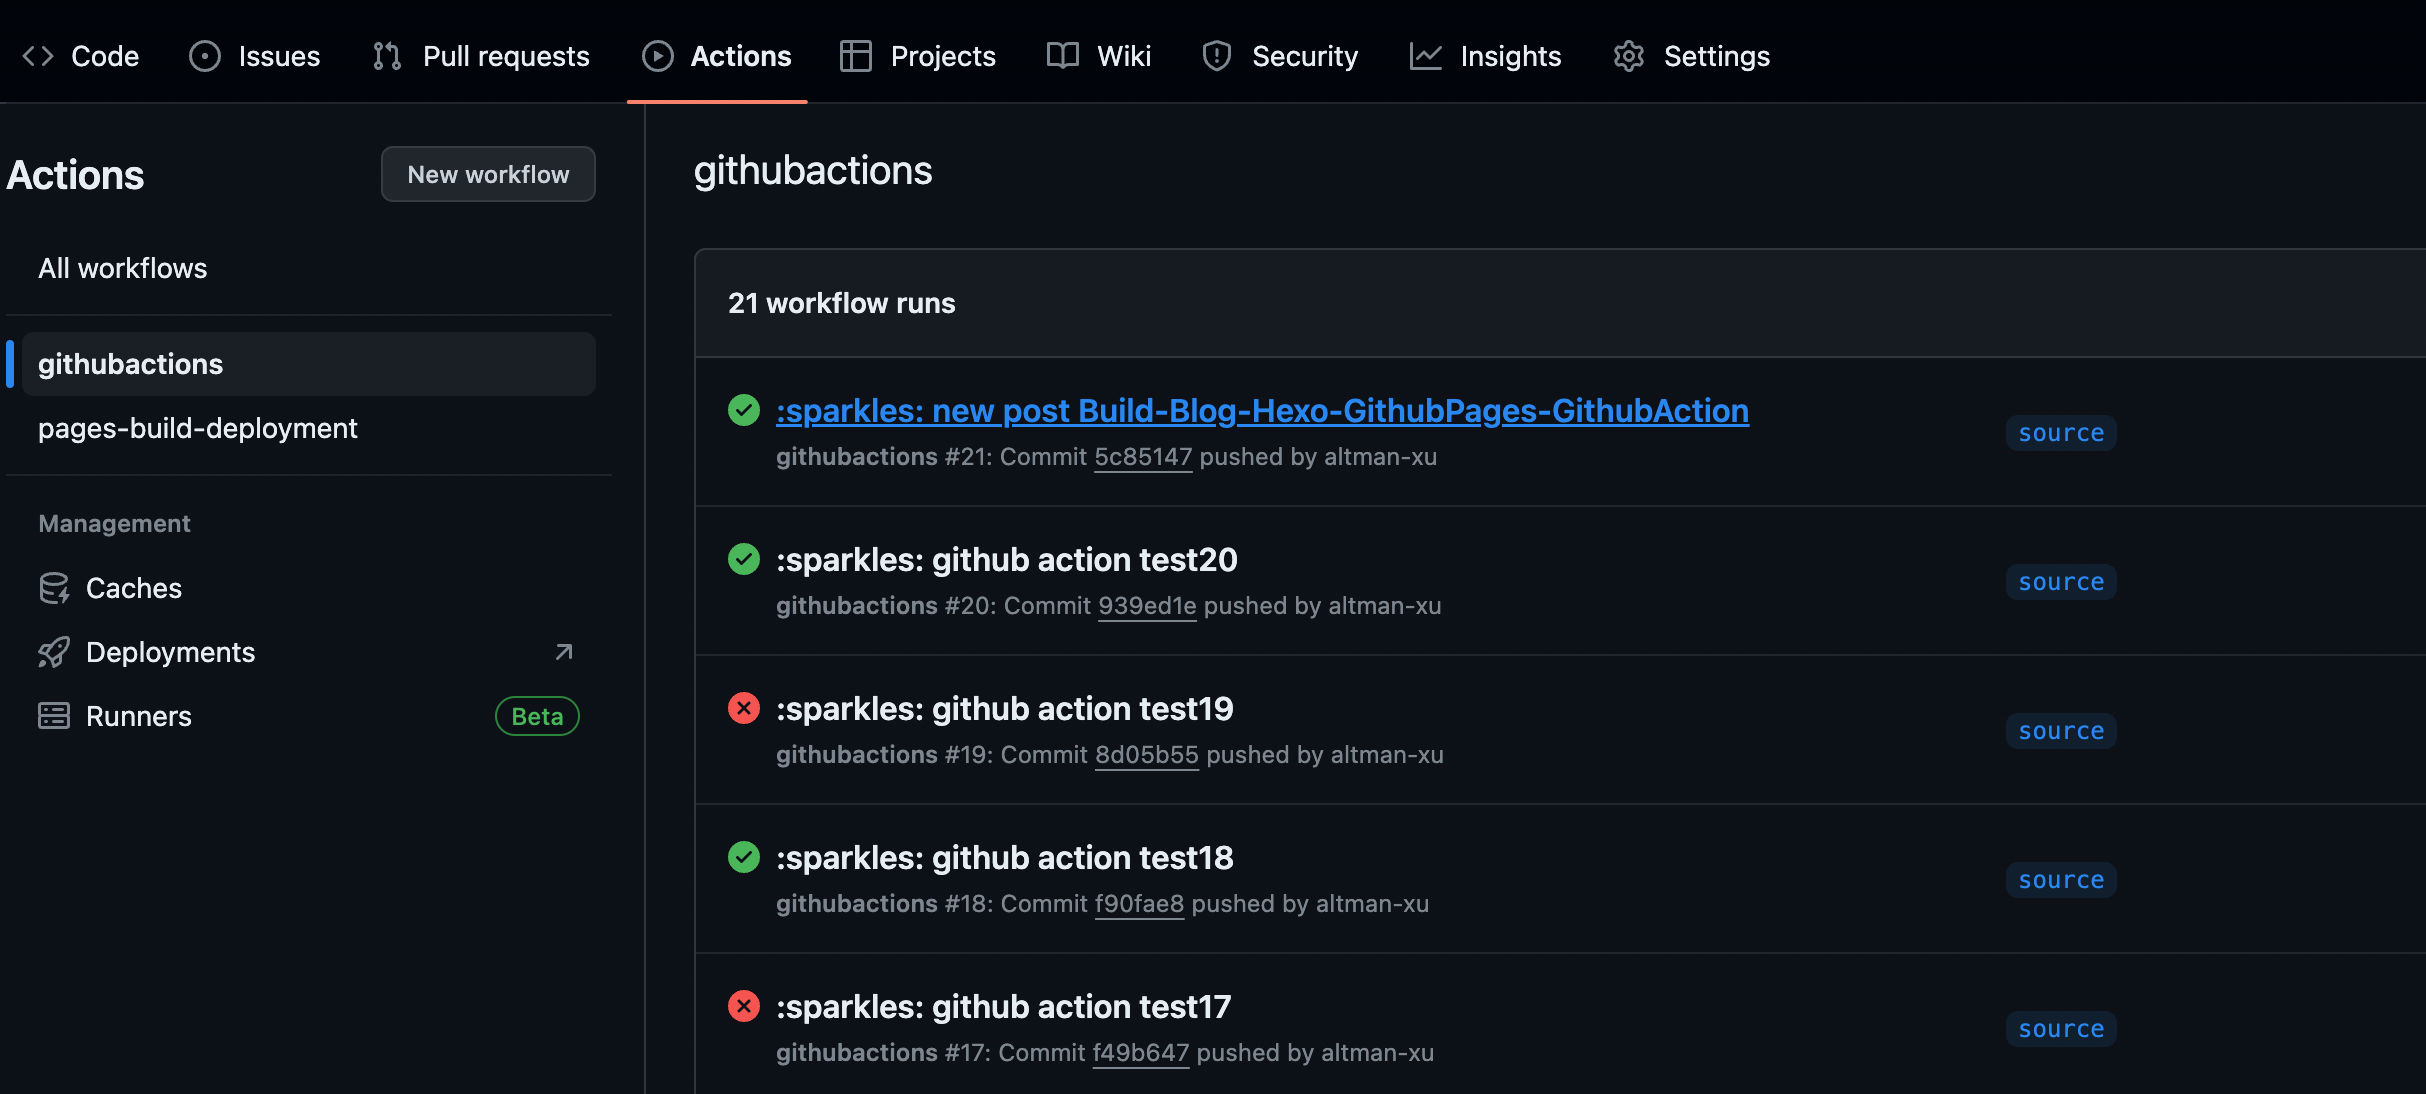
cicd 执行
每次在 source 分支, 编写新博客 md 文件, 提交到 git 远程后,都会触发 cicd 流程, 如下图所示, 可以点击进去查看 cicd 执行的每个步骤